Here we show you some effective Photoshop tutorial with the easiest way How to Clipping Mask in Photoshop? From this tutorial, you will learn quickly about clipping masks in detail, create a layer, make a selection in layers, give a feather radius, transform, and move well in the image.
Table of Contents
Add a header to begin generating the table of contents
What is a clipping mask in Photoshop?
A word clipping mask is a technique to combine some groups of the composite image and make an awesome converted new image. You can place an image to another image layer by layer, whatever your choice.
Now let’s start the tutorial show step by step. Please follow the tutorial and do it in your own Photoshop with your favorite picture. Take to mind steps showing process differ one to another due to the version of Photoshop software. Today we will show a tutorial for clipping mask put photography onto a frame.
We will show our tutorial with the most updated Photoshop software called Photoshop CC 2020.
Clipping masks an image into the frame.
What you need for creating clipping mask in Photoshop:
- Photoshop.
- A-frame image. Here is an example:

Image source: pixabay
- Need another Image for clipping mask in a frame. Example for:

Image source: pixabay
13 Easy Steps For Creating Clipping Mask In Photoshop:
- Open frame image in Photoshop.
- Duplicate Layer.
- Clipping path around the frame.
- Select the path.
- Add feather.
- Add a layer mask.
- Open an image you want to clip mask.
- Copy the second image and past onto the first image.
- Create a smart object.
- Create a clipping mask.
- Resize image.
- Adjust the correct perspective.
- Save image and close.
Here we will show you elaborately with Photoshop tutorial step by step:
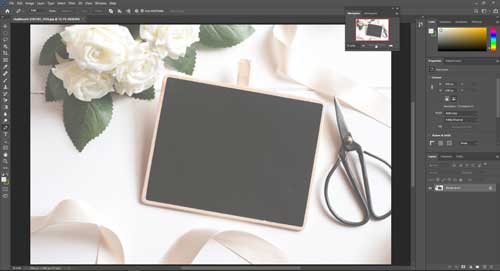
Step: 1 – Open frame image in Photoshop
Open a frame image in Photoshop CC that you want clipping mask for making a photography frame. This action will show you like below:
Step: 2- Duplicate Layer
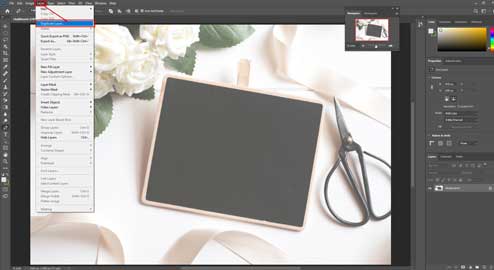
Duplicate the original background layer. For duplicate background, check on the top dropdown menu bar and click to layer > duplicate layer.
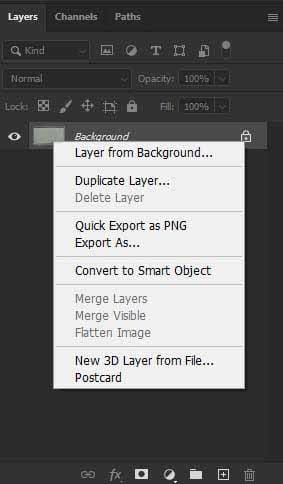
There is another option to duplicate the layer. You can duplicate the layer by Click on the right button over the background layer.
You can also duplicate the layer from the shortcut menu. For that, use Ctrl+J.
The result will show as a duplicate layer box will open and click ok. So duplicate layer will be created named Background copy. When you duplicate the background layer using a shortcut, the Layer name will be changed to Layer 1.
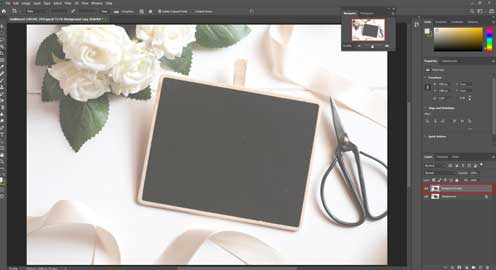
Leave the layer name as it is.
Step: 3- Clipping path around the frame
Now you have to clip a path around the frame; you want to picture your best choice.
But If you are new to Photoshop and do not know how to clipping path in Photoshop, you can kindly learn from our another tutorial named How to create a clipping path in Photoshop? From here, you can easily learn all about making a clipping path.
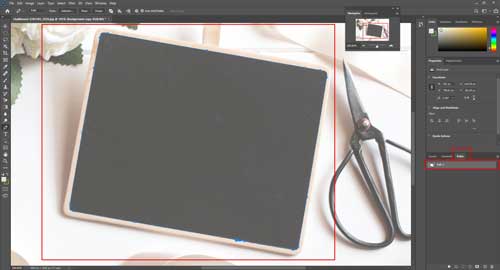
Remember, when you will make a clipping path, you have to keep select on the path panel because now you are in the Layer panel. So when you completed the clipping path, the result will show as like as below:
Step: 4- Select path.
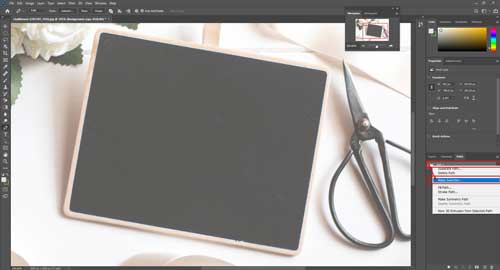
After completing the path, you have to make a selection. To make the selection, you need to go right side path panel and click on the mouse’s right button, then click Make Selection.
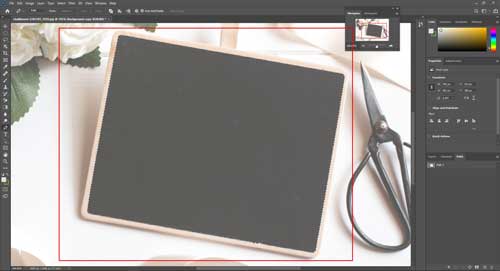
With Make Selection, there will be shown selection as “marching ants” around the selected area. The result will show like below:
Step: 5- Add Feather
After selection, add a feather radius minimum value of 0.4 to 0.8 as per image quality. To give a feather radius, you need to go top menu bar then click on Select > Modify > Feather. You can also add feathers by default shortcut menu Shift+F6 in Photoshop cs6 or later version.
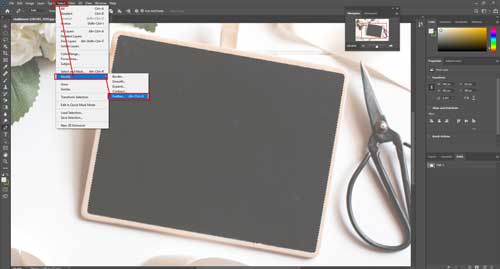
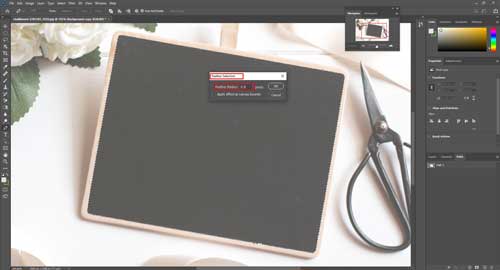
The Feather selection box will open and show as below, then click ok. So your feather will set up. This feather will give you a smooth edge on the image. It makes your image look natural and give a clean look so no one can find out these images are edited or look fake.
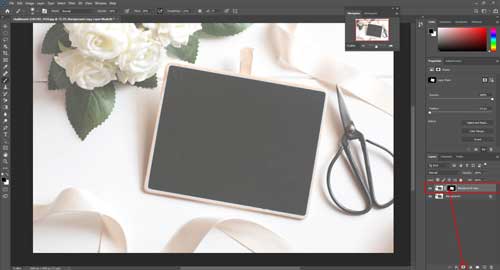
Step: 6- Add a layer mask.
Now keep the selection and give add layer mask on the background copy layer. We will use this Add layer mask option because it keeps our original background reserve for further use if, in the future, we need the background. So the result shown below when Add layer mask will be applied:
Step: 7- Open an image you want to clip mask.
In this step, you need another image for a place into the marked frame area, which we have done by Add a layer mask. Now open another image in Photoshop. You can easily drag another image and drop over a recent open framed image. To open a new image, go to the top menu bar and click file > open. It will show you your desktop box. From here, you can open a new image from your image location. The result will show you like below:
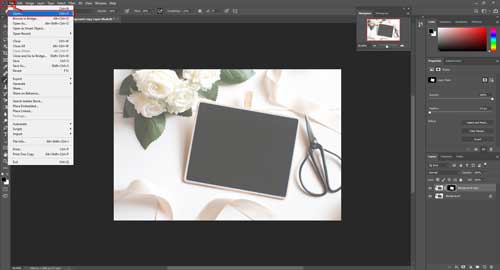
After selecting a new image from your image location, then clicks open from the box; thus, another image will open in a new tab. So you have a total of two images now in Photoshop. It will show you like below:
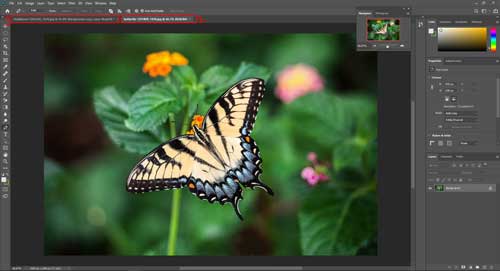
Step: 8- Copy the second image and past onto the first image.
Now the question is whereby we will take this new photo onto a framed photo? It is a very easy task. Just select all and copy then paste the first photo.
That’s all. But I will show you in detail. Go to the top menu bar then.
Click Select > All.
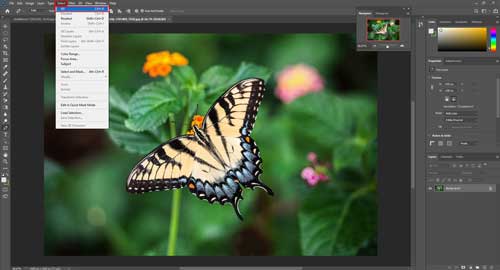
After clicking all, it will show you like below:
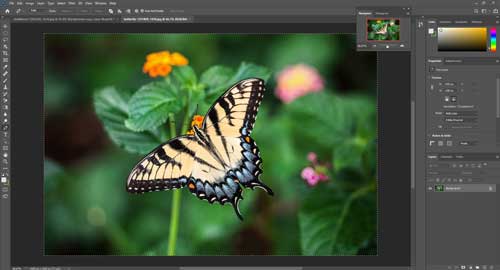
Then again, go top menu bar and click Edit > Copy from the top menu bar.
After the copy, you need to select image 1 like below:
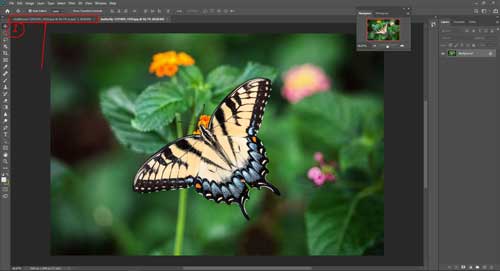
Then you need to paste. To paste the second image onto the first image, you can go menu.
Bar and select Edit > Paste.
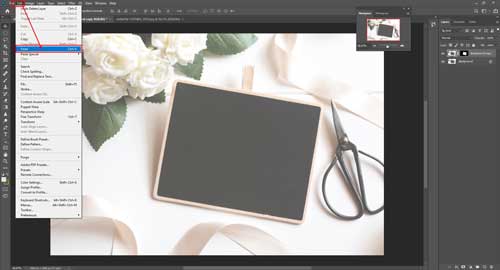
Or you can also copy and paste from the keyboard. Press the following keys together:
1. “CTRL (control) +A” for select entire image.
2. “CTRL +C” for the copy. Then select image 1 and
3. “CTRL+V” for paste. Which is the keyboard shortcut.
Now you can see, your image is pasted on image 1. But some problems appeared. The 2nd image covers image 1. So the result will be like below:
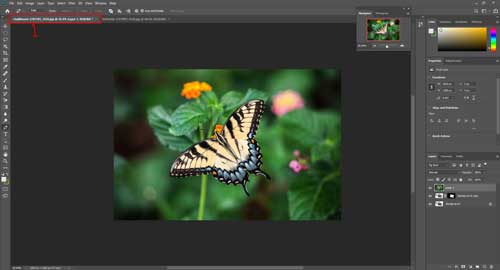
Step: 9- Convert to smart object.
You can see hare new image is pasted named with layer 1. Before applying a clipping mask, you just need to convert the object 2 image to Smart Object.
The question is, why we use the Smart Object?
Yes, very fairly; we have to use smart objects because if we convert smart objects in an image, image resolution will be preserved 100%. If it is necessary to resize the image like small or enlarge, we will ensure its blurriness.

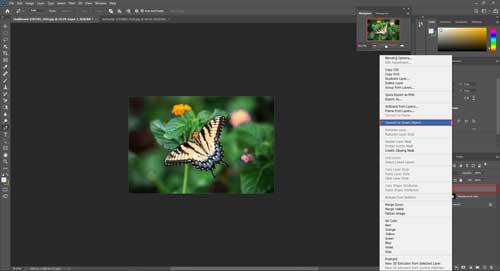
To convert to Smart Object of the image, click the right button mouse’s of the layer 1 image or pasted image, and then click the Convert to Smart Object option. It will appear like below:
Another option for Converting to a Smart Object, go to the top menu bar click layer > Smart Object > Convert to smart object. The result will be like below:
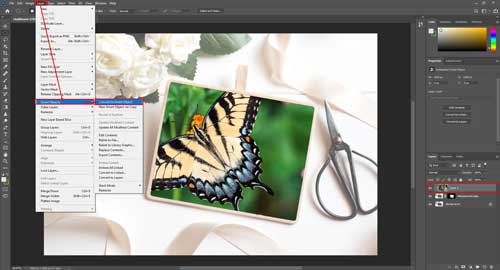
Another option for Converting to a Smart Object, go to the top menu bar click layer > Smart Object > Convert to smart object. The result will be like below:
Step: 10- Create a clipping mask.
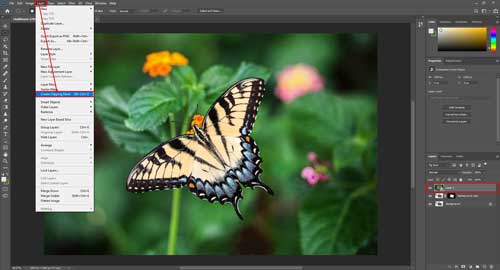
Let’s create some magic that is called a clipping mask in Photoshop. Yes, at last, we have come to the main topics called clipping mask in Photoshop. Now you have to clip mask the layer 1 image onto a duplicate background image, which is now shown as an Add Layer Mask option. To give clipping mask onto image 1 you have to keep a selection on layer 1 then go to the top menu bar click Layer > Create Clipping Mask.

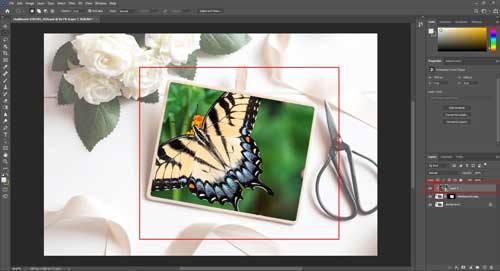
When you click on create a clipping mask, then the result will show like below:
Step: 11- Resize the image.
After creating a clipping mask, you will see only some parts of the image is showing in the frame but not entirely because when we have been applied to create a clipping mask in the layer 1 image, it has been adjusted with a duplicate background copy that was selected already only photography area. So now, you have to resize the image to show the entire image or the best part you want to see in the frame. To resize the image for showing best, you need to keep selecting layer 1, then go to the top menu bar and click Edit > Free Transform. You can also create free transform by press CTRL +T. It is keyboard the shortcut. When clicking on free transform, the result will show like below:
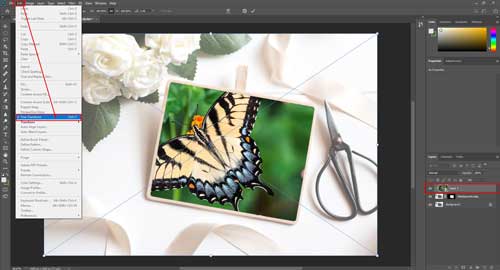
You will see here the entire layer 1 have been selected like a rectangle box and showing it has four corners with a tiny point. Now how will we resize this entire image and take the whole image into the frame? To do this, first press from keyboard ALT+SHIFT key. Then keep the mouse pointer any of one corner point of the rectangle box. Then hold the left button of mouse’s and push the box across the frame gradually. It will resize your image equally from all corners. The ultimate result will show like below:

Here you will see when the image push on inside the frame, the image shape is going smallest, but the main empty frame is revealed through under the image because the pasted image is straightened; on the other hand, the frame is angled. As a result, the image perspective does not match with the frame.
Step: 12- Adjust the correct perspective.
In this step, you need to correct the right perspective image’s to adjust to the frame. Very easily, you can do this. To do this, keep the transform mode and see when you put the mouse cursor outside of the rectangle bow; you will see a small two joined arrow symbol. Now, click and hold on the left button mouse’s, then move up or down; adjust with frames perspective. So the result will show like below:

Now you will see the correct perspective of the image with the frame is adjusted. But still, inside frames, showing the right side of the frame. You can move it smoothly to put on the mouse cursor inside the image the drag image and move a little bit right side until the frame is covered with the image.
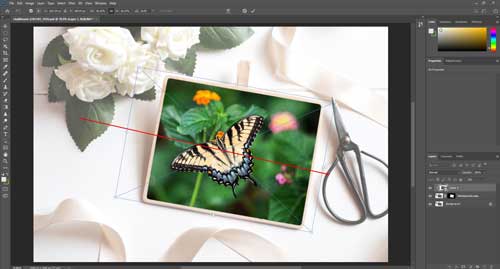
As perspective is accurate from your side, click on commit transform, which will show the top middle. Or you can press ENTER from the keyboard. The result will be shown like this:

Step: 13- Save image and close
At last, you need to save the worked file in your favourite format. You can save your file in various formats like PSD, PSB, JPEG, TIFF, and PNG. To save your file, press CTRL+SHIFT+S from the keyboard. Or go top menu bar click File > Save As. It will show:
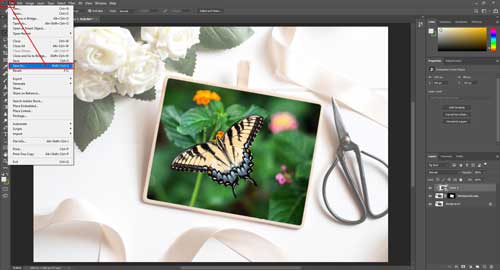
And, after saving your file, you have to close your finished work. To close, go to the top menu bar and click.
File > Close. You can also close any finished file by press CTRL+W from the keyboard. That is the keyboard shortcut. See below:

Conclusion:
At the end of the tutorial, we believe you have learned how to clipping mask in Photoshop. Remember, you need to adjust the correct perspective only when your frame or image is angled. But if the image and frame are both straight in position, you do not need to correct the perspective.
You can use the clipping mask in a different section of the professional photo editing service. If you want to provide any preferable images effect on any text, you can also use the clipping mask technique. Or, if you want to place the logo on a shirt or pants image in a particular place, you can use it. You can also apply a clipping mask to recolor any images And so on. So be happy, and thanks a million to see our tutorial with a lot of patience.


